If you haven't already visit my new blog Kimberly Michelle Designs at http://kimberlymichelledesigns.blogspot.com/ and be sure sign up for email notifications when I post and follow my new blog. While you are there enter the giveaway I have going on.
Happy Crafting!
Kimberly Michelle
Saturday, September 23, 2017


Sunday, June 4, 2017
Kimberly Michelle Designs is Up and Running
Hello Friends!
I am thrilled to announce that Kimberly Michelle Designs is finally up and running. https://kimberlymichelledesigns.blogspot.com/ This has taken more time then I expected so sorry for the delay. I will leave this blog up for a couple of weeks and then it will close.
Just some quick housekeeping. If you want to continue to follow my blog you will need to go to Kimberly Michelle Designs and do the following.
Subscribe to receive e-mail notifications of my new blog post:

Then, if you would like, follow my blog:
 Be sure to also subscribe to my YouTube channel so that you don't miss any upcoming tutorials and quick tips videos I will be sharing: https://www.youtube.com/channel/UCngF9lrEBPNbcedErvNxuiQ
I am so excited to share the projects and Cricut cut files I am creating. I will also be sharing some digital papers that I create and these can be used in Cricut Design Space. Here is an example.
 So, be sure to follow the above links and subscribe and follow my new blog:
I am thrilled to announce that Kimberly Michelle Designs is finally up and running. https://kimberlymichelledesigns.blogspot.com/ This has taken more time then I expected so sorry for the delay. I will leave this blog up for a couple of weeks and then it will close.
Just some quick housekeeping. If you want to continue to follow my blog you will need to go to Kimberly Michelle Designs and do the following.
Subscribe to receive e-mail notifications of my new blog post:

Then, if you would like, follow my blog:
I am so excited to share the projects and Cricut cut files I am creating. I will also be sharing some digital papers that I create and these can be used in Cricut Design Space. Here is an example.

Happy Crafting,
Kimberly Michelle
Friday, June 2, 2017
Sneak Peek and Update
Hello Crafters! I know it has been awhile since I posted a tutorial but it has been a little hectic...funny how life can get that way. My craft studio is finally getting organized; I decided to move to a different room which is more secluded. This will help when making videos.
I wanted to share with you before I made any changes but I have finally decided to change the name of my blog to Kimberly Michelle Designs. I have struggled with this decision for sometime and finally decided to take the plunge. I just want my blog name relate to me personally. Plus, I will be creating more designs to share with, such as, digital backgrounds that can be used in Cricut Design Space. I will also be creating a little craft series like Quick tip videos and posts...I have too many ideas and not enough time. Also, I will be doing some live YouTube videos to show how to make a project like a one page mini album that I have been really wanting to share with you.
I wanted to give you a sneak peek of what I am working on now. I am working on creating split cards...I am obsessed with these. Here is a little video and pictures of cards I have made.


Be sure you are subscribed for email notifications of my blog posts and my YouTube channel. Here is the link: https://www.youtube.com/channel/UCngF9lrEBPNbcedErvNxuiQ
See you soon and Happy Crafting!
Kimberly Michelle
I wanted to share with you before I made any changes but I have finally decided to change the name of my blog to Kimberly Michelle Designs. I have struggled with this decision for sometime and finally decided to take the plunge. I just want my blog name relate to me personally. Plus, I will be creating more designs to share with, such as, digital backgrounds that can be used in Cricut Design Space. I will also be creating a little craft series like Quick tip videos and posts...I have too many ideas and not enough time. Also, I will be doing some live YouTube videos to show how to make a project like a one page mini album that I have been really wanting to share with you.
I wanted to give you a sneak peek of what I am working on now. I am working on creating split cards...I am obsessed with these. Here is a little video and pictures of cards I have made.


Be sure you are subscribed for email notifications of my blog posts and my YouTube channel. Here is the link: https://www.youtube.com/channel/UCngF9lrEBPNbcedErvNxuiQ
See you soon and Happy Crafting!
Kimberly Michelle
Sunday, May 7, 2017
Masculine Birthday Card
Hi All! I was going through my craft photos and found one I had not shared before. And since I have not had a chance to post any crafty goodness (I am finally getting settled in my new craft room) lately I thought I would share this card I made for my Dad.


Thursday, March 16, 2017
Survey Time!
Hello Crafters! Just a quick question. I am thinking about having a live paper crafting class. Do you prefer YouTube Live or Periscope? Please, leave a comment below. And thanks in advance.
Happy Crafting!
Kimberly
Happy Crafting!
Kimberly
Sunday, March 12, 2017
Cricut St. Patrick's Day Spinner Card
Hello Crafters! I have been wanting to make a spinner card for some time and finally was up for the challenge. I am sorry I am getting this up later than I would like but the tutorials were long and took some time to upload. If you have any questions, please, leave a comment or e-mail me. All the images are available in Cricut Design Space Access. Here is the cut file from Cricut Design Space: https://us.cricut.com/design/#/canvas/54935685


Cricut Design Space - Print Then Cut
Hello Crafters! I had a request with my last video asking that I show how I use the Print then Cut feature in Cricut Design Space. I know there are many tutorials but I am to please. So, here are the videos and links.
I hope you found this helpful. If you have any questions, please, leave me a comment or e-mail me.
Happy Crafting!
Kimberly
Cricut Design Space - Print then Cut: Converting an Image
Watch below or click Here
Cricut Design Space - Print then Cut: Adding a Pattern
Watch below or click Here I hope you found this helpful. If you have any questions, please, leave me a comment or e-mail me.
Happy Crafting!
Kimberly
Friday, February 3, 2017
Wild About You Valentine Card featuring Miss. Kate Cutables
Hello, all! I am excited to share a Valentine's Day card with you. And it is my pleasure to be guest designing for Miss. Kate Cuttables. When I found that I would be creating this card for the month of February I knew exactly what I wanted to create. This card features the following cut files from Miss. Kate Cuttables: Zoo Fun Bundle, Wild About You title, and Nested Hearts.
I include all the measurements for this cute little critter peek-a-boo card. I included a process video (at the end of this post) which shows how I assembled my card. If you would like to see a tutorial on how to create a peek-a-boo card in Cricut Design Space leave a comment. I hope you enjoy!


This card measures 5" x 7" and I used a kraft cardstock for my card base. It is a larger card but I think a child would love this cute critter card.

I used my Cricut Explore for all the die cutting and Cricut Design Space to create the design. These files include a JPEG, PNG, and SVG so that it can be used with most electronic die cutting machines. I created a single panel (left) from kraft cardstock; I find this makes creating dimensional cards easier to assemble. The pink card is my main panel where my little critters come to life. I lined up a heart from the Nested Heart file which created this peek-a-boo frame.


These are the hearts that I created from the Nested Heart file. They are the same size as the heart cut outs on the main panel. I used embossing folders to add texture. It is amazing what a difference this made. These hearts measure 2.19" x 1.95". Using my main pink panel as a template I adhered the hearts to the kraft panel; I show this process in the video.

I wanted to add a layered accent panel for the front of my card. I used the Straight and Slim font in Cricut Design Space to write 'Valentine'. I offset the cream cardstock to the right (when layering; see above photo) to create interest.


For my sentiment I used the Wild About You title. I love all the layers with this sentiment. I used my Xyron Create-A-Stick to adhere the words to the shadow. The title measures 2.4" x 2.3". And it includes some fun tropical leaves.

I just smile when I look at these little critters which are from the Zoo Fun Bundle. I used the PNG file that is included in the bundle and the Print then Cut feature in Cricut Design Space to create my critters. I used Glossy Accents on the eyes and nose to bring them to life.
Here is the process video or watch on YouTube:
I include all the measurements for this cute little critter peek-a-boo card. I included a process video (at the end of this post) which shows how I assembled my card. If you would like to see a tutorial on how to create a peek-a-boo card in Cricut Design Space leave a comment. I hope you enjoy!


This card measures 5" x 7" and I used a kraft cardstock for my card base. It is a larger card but I think a child would love this cute critter card.

I used my Cricut Explore for all the die cutting and Cricut Design Space to create the design. These files include a JPEG, PNG, and SVG so that it can be used with most electronic die cutting machines. I created a single panel (left) from kraft cardstock; I find this makes creating dimensional cards easier to assemble. The pink card is my main panel where my little critters come to life. I lined up a heart from the Nested Heart file which created this peek-a-boo frame.


These are the hearts that I created from the Nested Heart file. They are the same size as the heart cut outs on the main panel. I used embossing folders to add texture. It is amazing what a difference this made. These hearts measure 2.19" x 1.95". Using my main pink panel as a template I adhered the hearts to the kraft panel; I show this process in the video.

I wanted to add a layered accent panel for the front of my card. I used the Straight and Slim font in Cricut Design Space to write 'Valentine'. I offset the cream cardstock to the right (when layering; see above photo) to create interest.


For my sentiment I used the Wild About You title. I love all the layers with this sentiment. I used my Xyron Create-A-Stick to adhere the words to the shadow. The title measures 2.4" x 2.3". And it includes some fun tropical leaves.

I just smile when I look at these little critters which are from the Zoo Fun Bundle. I used the PNG file that is included in the bundle and the Print then Cut feature in Cricut Design Space to create my critters. I used Glossy Accents on the eyes and nose to bring them to life.
Here is the process video or watch on YouTube:
It was my please to create this card for Miss. Kate Cuttables; be sure to visit her store for awesome cut files.
Happy Crafting,
Kimberly
Tuesday, January 31, 2017
Where did January go?!
Hello, all! I can't believe January has come and is almost gone. It has been a busy month and I have not had much time for crafting. But I do have some exciting news. I have been asked to be a Miss Kate Cuttables Guest Designer. My project will be published on February 3rd; I also created a process video showing how I assembled my project. I have some other projects that I am working on and will be sharing with you soon - this will include some Cricut Design Space cut files. I pray and hope all is well in your life.
Happy Crafting,
Kimberly
Happy Crafting,
Kimberly

Saturday, December 24, 2016
Believe Chrsitmas Card
Hello Crafters! It's Kimberly with a fun Christmas card featuring the Kat Scrappiness 'Believe' brush script die. Also, I used the Hero Arts Color Layering Snowy Tree stamp set. I show how to use to create the layered snowy tree in a process video - click Here or watch above.


Monday, December 19, 2016
Christmas Shaker Card featuring the Kat Scrappiness 'Jingle All the Way' die
Hello Crafters! Kimberly Sisco here with another project I created for my Guest Designer spot for Kat Scrappiness. I created a Christmas shaker card featuring the gorgeous Kat Scrappiness ‘Jingle All the Way’ brush script die.

Saturday, December 3, 2016
Happy Holidays Featuring the Stitched & Layered Christmas Tree Die by Kat Scrappiness
Hello Crafters! Kimberly here and it is my pleasure to be a Guest Designer for Kat Scrappiness. Today I am sharing a Christmas card which features the Stitched & Layered Christmas Tree Die by Kat Scrappiness; along with some wonderful products from her store.


Tuesday, November 1, 2016
Cricut Design Space - Manipulating Large Images
Hello Everyone!
Since posting my last project (a Halloween wreath) I have had a few questions on how to cut out a larger image in Cricut Design Space so that the image will cut from a 12 x 12 piece of card stock. I created a short video demonstrating how to arrange a larger image in the preview screen in CDS. Please, let me know if you have any other questions.
Watch below or click Here:
Since posting my last project (a Halloween wreath) I have had a few questions on how to cut out a larger image in Cricut Design Space so that the image will cut from a 12 x 12 piece of card stock. I created a short video demonstrating how to arrange a larger image in the preview screen in CDS. Please, let me know if you have any other questions.
Watch below or click Here:
Saturday, October 29, 2016
Cricut Halloween Project
Hello Crafters!
I know it has been a long time but I am finally able to get my craft on and share a project with you. I know Halloween is around the corner but I wanted to share a quick Halloween wreath that I created in Cricut Design Space. The cut file will be at the end of the post and I share a video tutorial on how to put it together.

I know it has been a long time but I am finally able to get my craft on and share a project with you. I know Halloween is around the corner but I wanted to share a quick Halloween wreath that I created in Cricut Design Space. The cut file will be at the end of the post and I share a video tutorial on how to put it together.

Monday, August 1, 2016
Crafty Hiatus
Hello Crafters! I wanted to stop by and say hello. I am having to take a bit of a hiatus from crafting; this has been very challenging. My husband and I are preparing to move within the next month. Doing this will reduce my commute time from 2 hours per day to about 15 - 20 minutes per day; which equals more time for crafting and making video tutorials for you (which I love doing). So, hang in there with me and I should be up and running this September in my new crafty space. Please, take care and have a blessed day.
Happy Crafting,
Kim
Sunday, May 29, 2016
Cricut Bump in the Night Birthday Card
Hello Crafters!
I wanted to share a boys birthday card that I created with Cricut Design Space. The main characters come for the Cricut cartridge 'Bump in the Night'. All images are included in the Cricut Access Subscription. The Cricut Design Space cut file and video tutorial link are available at the end of this post.


I wanted to share a boys birthday card that I created with Cricut Design Space. The main characters come for the Cricut cartridge 'Bump in the Night'. All images are included in the Cricut Access Subscription. The Cricut Design Space cut file and video tutorial link are available at the end of this post.

I used the Print then Cut feature in Design Space for my monsters and the Raaaarh sentiment. To give these images depth I used Glossy Accents on the monster faces and the sentiment. I also painted the cut edges with a brush pen, such as Tim Holtz Distress Markers, in a coordinating color. It really gives the images a finished look.

I let my Cricut Explore do the writing for me, as you can see with the inside sentiment. The dot patterned paper is from Simple Stories 'Snap Color Vibe'; I am in love with this little 6 x 6 packet. The color theme for my card is Mustard Yellow, Dark Orange, and Peacock Teal.
Thank you for stopping by today. Please, let me know if you have any questions. The video tutorial will show how to assemble this card; I would appreciate if you would like my video and become a YouTube subscriber.
Also, I made this card for Die Cuttin' Diva's challenge blog - the theme is Polka Dots. Head over and try their challenges; I find them very inspiring. Click HERE to be taken directly to their blog.
Click HERE for the Cricut Design Space cut file.
Click HERE for the YouTube video tutorial or Watch Below.
Monday, May 23, 2016
Subscribe & Connect is now easier!
Hello Crafters!
I just wanted to share with you a quick little update on my blog. I have added some quick connect links to the right of my blog. I felt this would make connecting with you easier. I hope you will join me in my crafting adventures. I look forward to sharing another project with you very quickly.
Happy Crafting, Kim
I just wanted to share with you a quick little update on my blog. I have added some quick connect links to the right of my blog. I felt this would make connecting with you easier. I hope you will join me in my crafting adventures. I look forward to sharing another project with you very quickly.
 |
| These are not clickable links. Just take a peek to the right of this post and the clickable links are ready to go. |
Wednesday, May 18, 2016
Fishbowl Shaker Card Video Tutorial
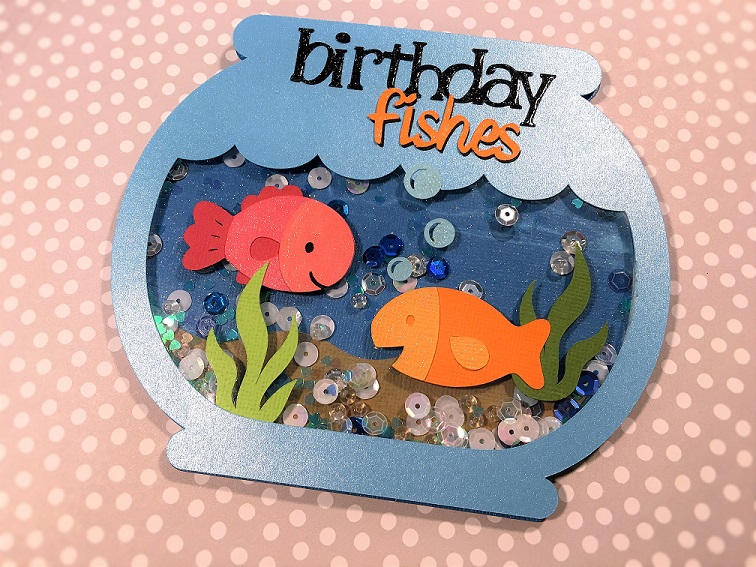
Hello Crafters! I finally completed editing and uploading the video tutorial for my Fishbowl Shaker Card.


Watch Part 1 Below or on YouTube
Please, leave a comment or share a photo of your project on my FaceBook Page - click Here. For the Cricut Design Space cut file - click Here. Just an FYI...if you do not own the cartridge A Child's Year you will need to delete Birthday. You can easily create your own or use one you own. If you need help let me know.

Watch Part 1 Below or on YouTube
Watch Part 2 Below or on YouTube
Please, leave a comment or share a photo of your project on my FaceBook Page - click Here. For the Cricut Design Space cut file - click Here. Just an FYI...if you do not own the cartridge A Child's Year you will need to delete Birthday. You can easily create your own or use one you own. If you need help let me know.
Be sure to become a Follower of this blog and sign up for e-mails so that you can be notified when I share projects and cut files. Thanks for stopping by.
Happy Crafting! Kim
Happy Crafting! Kim
Sunday, May 15, 2016
Cricut - 'Birthday Fishes' Shaker Card
Hello Crafters!
I wanted to share a birthday card that I created in Cricut Design Space; I share the cut file for this particular project (it is at the end of this post). I could not resist the idea of making this shape card.

All images, except for the bubbles, came from the 'Create a Critter' cartridge; which is included in the Cricut Access Subscription. And the bubbles come from a bathtub image in 'Kate's ABCs'; I deleted the bathtub. The birthday sentiment is from 'A Child's Year' and is not included in the Cricut Access. If you do not own this cartridge you can simply delete the image from the cut file and add one you own or create; the word fishes was created the 'Suburbia' font. I added Wink of Stella to the fish and the sentiments. Also, I added Glossy Accents to the word birthday to add a little pop.
I chose to make this card into a shaker; my sequins are from Doodlebug. I have made a video tutorial on how to make the shaker card but it is taking some time to upload to my computer. Be sure to subscribe to my YouTube channel so you don't miss the video - click HERE!
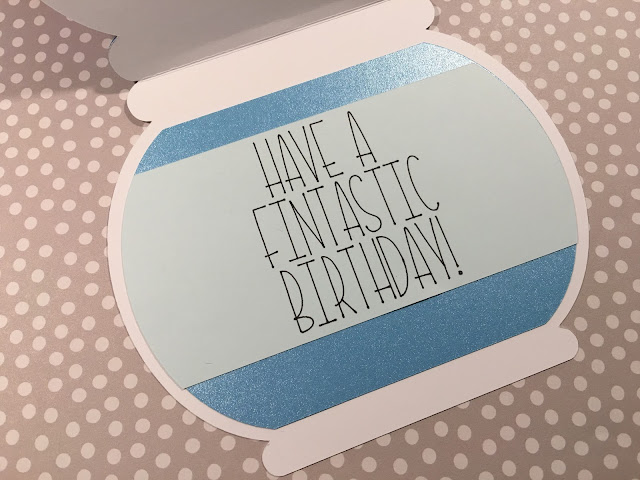
I kept the inside simple and funny. I used the Kyden font for my sentiment. Thank you for stopping by and visiting. I was inspired to make this card for the Die Cuttin Divas Challenge; stop by and check them out.
Happy Crafting ~ Kim
Cricut Design Space cut file - click HERE
My YouTube Channel - click HERE
I wanted to share a birthday card that I created in Cricut Design Space; I share the cut file for this particular project (it is at the end of this post). I could not resist the idea of making this shape card.

All images, except for the bubbles, came from the 'Create a Critter' cartridge; which is included in the Cricut Access Subscription. And the bubbles come from a bathtub image in 'Kate's ABCs'; I deleted the bathtub. The birthday sentiment is from 'A Child's Year' and is not included in the Cricut Access. If you do not own this cartridge you can simply delete the image from the cut file and add one you own or create; the word fishes was created the 'Suburbia' font. I added Wink of Stella to the fish and the sentiments. Also, I added Glossy Accents to the word birthday to add a little pop.
I chose to make this card into a shaker; my sequins are from Doodlebug. I have made a video tutorial on how to make the shaker card but it is taking some time to upload to my computer. Be sure to subscribe to my YouTube channel so you don't miss the video - click HERE!
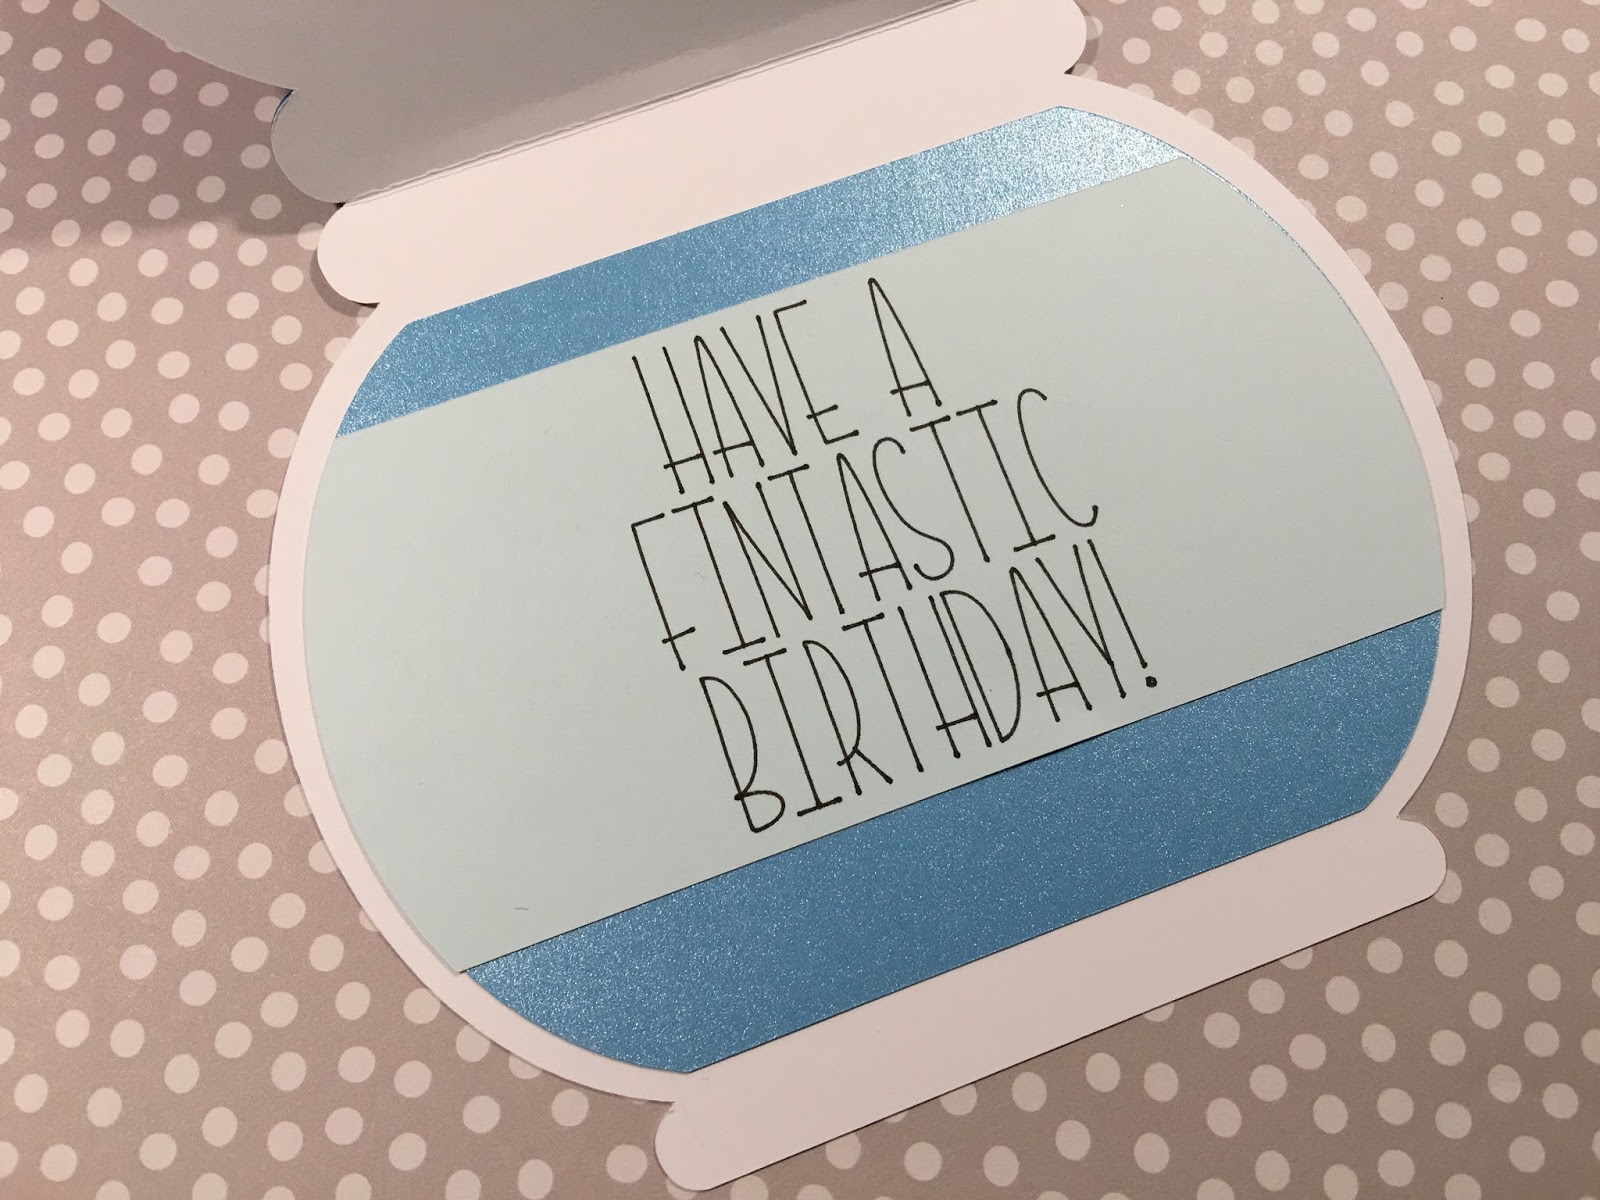
I kept the inside simple and funny. I used the Kyden font for my sentiment. Thank you for stopping by and visiting. I was inspired to make this card for the Die Cuttin Divas Challenge; stop by and check them out.
Happy Crafting ~ Kim
Cricut Design Space cut file - click HERE
My YouTube Channel - click HERE
Monday, May 9, 2016
Sunshine & Laughter Card
Hello Crafters!
I wanted to share a quick and happy card with you today that I created with my Cricut Explore.

I wanted to share a quick and happy card with you today that I created with my Cricut Explore.

Subscribe to:
Posts (Atom)